Thursday, March 12, 2015
In the previous two blogs we've gone through the steps to setting up the virtual machine to install the Ubuntu Server on VirtualBox, in this blog we will go over the steps to installing the Ubuntu Server. Be warn this is a long blog. I usually try to break up my blog so that you won't doze off, but I feel like this one has be left in tack. Here are the steps to install Ubuntu Server on your VirtualBox.
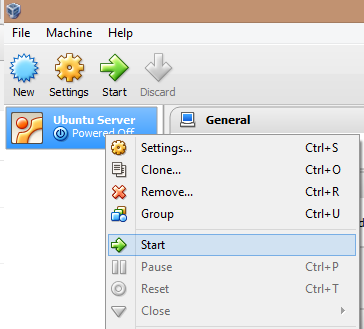
1. Right click on the "Ubuntu Server" virtual machine and select "Start"
2. Select "English", then press Enter

3. Click or press Enter on "Install Ubuntu Server"

4. Click "Capture" on the dialog that pops up

Note: Press Windows Icon + Ctrl to uncapture your mouse, so that you can get control back of your mouse.

4. Select "English" or the language that you speak for the installation process language
5. Select your location

6. Select "No" on "Detect keyboard layout?" question, this is a matter of preference so if you want to you can select "Yes"

7. Select your country for the keyboard

8. Select your keyboard layout, if you don't have anything fancy the simplest choice should suffice. I chose "English (US)". If you have a Mac you chose "English (Macintosh"

9. The installation process will begin, just let it run.

10. Assign you hostname, I gave mine the hostname "ubuntuvb" but you can give it any name you want. "Pookie"? Anyone?

11. Use down arrow key to select "Continue" option, then press "Enter"

12. Give your main user a name, a user that is not "root"

13. Use the down arrow to select "Continue" and then press "Enter"
14. Give the user above a username, I gave mine the username of "techjunkie", choose a username that like


32. You will see the "Installation is complete...." message, select "Continue", then press "Enter"


Blogs in this series:
1. Right click on the "Ubuntu Server" virtual machine and select "Start"

2. Select "English", then press Enter
3. Click or press Enter on "Install Ubuntu Server"
4. Click "Capture" on the dialog that pops up
Note: Press Windows Icon + Ctrl to uncapture your mouse, so that you can get control back of your mouse.
5. Select your location
6. Select "No" on "Detect keyboard layout?" question, this is a matter of preference so if you want to you can select "Yes"
7. Select your country for the keyboard
8. Select your keyboard layout, if you don't have anything fancy the simplest choice should suffice. I chose "English (US)". If you have a Mac you chose "English (Macintosh"
9. The installation process will begin, just let it run.
10. Assign you hostname, I gave mine the hostname "ubuntuvb" but you can give it any name you want. "Pookie"? Anyone?
11. Use down arrow key to select "Continue" option, then press "Enter"
12. Give your main user a name, a user that is not "root"
13. Use the down arrow to select "Continue" and then press "Enter"
14. Give the user above a username, I gave mine the username of "techjunkie", choose a username that like
15. Use the down arrow to select "Continue" and then press "Enter"
16. Assign a password for the user
15. Rinse and repeat, I mean use the down arrow to select "Continue" and then press "Enter"
16. Enter the password again on the confirmation screen, then select "Continue"
17. The next screen will ask you if you want to encrypt your home directory, answer "No" then press "Enter". You can always encrypt it later after installation without re-installing.
18. Select your time zone, select "Yes" then press "Enter"
19. On the "Partition disks" screen, select "Guided - use entire disk and set up LVM", then press "Enter"
20. Ubuntu will pick up the virtual disk that we've created earlier. Press "Enter"
21. Select "Yes" to write the partition tables to the awesome SCSI3 drive that we've just created in VirtualBox.
22. Accept the maximum default size, then select "Continue" and press "Enter"
23. Confirm your changes to the disk, and "Let the install begin!", "Are you not entertained?". I know what you are going to say. "Ah, not really." But, just try and hold back the excitement. Sadly this blog will end soon. "Please, stay on your seat until the ride is over. Thank you!" Select "Yes" and then press "Enter"
24. Installation progress is displayed, just enjoy the ride. Get a cup of coffee, or something.
25. In the middle of your ride, I mean install you will be interrupted with a http proxy setting, if you have one, type it in right now else leave it blank. Rinse and repeat, select "Continue" and press "Enter"
26. The ride continues
27. Select "No Automatic updates" and then press "Enter"
28. It will ask you to install extra features that you need. Since this install only focus on the core installation of Ubuntu plus we want to go back to our ride, we will select nothing, by pressing the "Tab" key until the "Continue" choice has been selected. Press "Enter" once "Continue" is selected.
29. And let it ride!
30. Select "Yes" to install the "GRUB boot loader" on the disk. The "GRUB boot loader" is just an OS selector menu, similar to the one that Windows has on a dual boot system. Press "Yes"
31. The install continues
32. You will see the "Installation is complete...." message, select "Continue", then press "Enter"
33. After the reboot you will be presented with a beautiful command line. Before, you throw your keyboard at the screen, not to worry. We will give this bad boy a GUI interface. Sadly, this ride is over. See you next time!
Blogs in this series:
Subscribe to:
Post Comments (Atom)


best makeup artist in gurgaon
ReplyDeletebest makeup academy in gurgaon
Liên hệ Aivivu, đặt vé máy bay tham khảo
ReplyDeletevé máy bay đi Mỹ hạng thương gia
vé máy bay từ houston về việt nam
chuyến bay từ canada về việt nam
vé máy bay từ nhật về việt nam 2021
ve may bay tu han quoc ve viet nam
Vé máy bay từ Đài Loan về Việt Nam
ve may bay chuyen gia nuoc ngoai sang Viet Nam
09698C1E66
ReplyDeleteTakipçi Satın Al
Footer Link Satın Al
Google Konum Ekleme
Eti Mutlu Kutu Kodları
101 Okey Vip Hediye Kodu