Friday, July 22, 2016
In ASP.NET MVC there is a default layout file that the application use when one exists. If you look at the markup at the top of the "Index.cshtml" file you will see that there is a markup to specify the layout of the page in the code below.
The code above tells ASP.NET MVC to not assign any layout to the page because it is being set to null. In this blog we will build on our existing NorthwindCafe.Web project and add a default layout view to the project so that each page in the project will have a common layout. This is similar what you would a master page for in web forms.
Step-By-Step Instructions:
1. Open the "NorthwindCafe.Web project in Visual Studio
2. Right-click on the Views folder then select Add → New Item → .NET Core → MVC View Start Page then click the "Add" button

4. Now you will see the _ViewStart.cshtml file in the "Views" folder

5. Delete all the markup in the _ViewStart.cshtml file, then type in the following lines of code, then save the file
6. Right-click on the "Views" folder again, then this time create a folder call "Shared"

7. Right-click on the "Shared" folder then select Add → New Item → .NET Core → MVC View Layout Page , name the file "_Layout.cshtml", click on the "Add" button

8. When you are finish you should have the following folder structure in your "Views" folder

9. In the _Layout.cshtml file you will see the following markup
In the code above the line @RenderSection("head", required: false) tells MVC to render the head section if it's there in the web page, however it is not required. Then in the line @RenderBody() tells MVC to render the body. We added the line <h1>This is from the _ViewStart.cshtml</h1> as an indicator that _ViewStart.cshtml file is being applied.
10. Now we are going to use the default _ViewStart.cshtml layout with our "Index.cshtml" file
11. Open the "Index.cshtml" file and delete all the markup for it if you have any
12. Now type in the following markup for the page index.cshtml
In the code above all we have to do is type in the markup for our page, the common tags like the head and body tag has been taken care of by the layout.
Even though we didn't define any layout in our "Index.cshtml" file the layout specified in the _ViewStart.html file was automatically applied to our page.
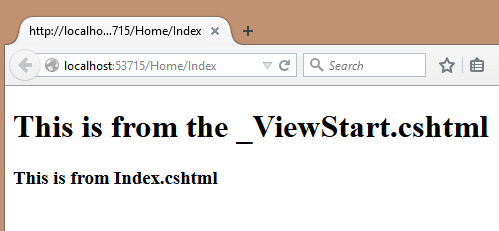
If you run the application by pressing Ctrl+F5 you will the following
@{
    Layout = null;
}
The code above tells ASP.NET MVC to not assign any layout to the page because it is being set to null. In this blog we will build on our existing NorthwindCafe.Web project and add a default layout view to the project so that each page in the project will have a common layout. This is similar what you would a master page for in web forms.
Step-By-Step Instructions:
1. Open the "NorthwindCafe.Web project in Visual Studio
2. Right-click on the Views folder then select Add → New Item → .NET Core → MVC View Start Page then click the "Add" button
4. Now you will see the _ViewStart.cshtml file in the "Views" folder
5. Delete all the markup in the _ViewStart.cshtml file, then type in the following lines of code, then save the file
@{
    Layout = "~/Views/Shared/_Layout.cshtml";
}
6. Right-click on the "Views" folder again, then this time create a folder call "Shared"
7. Right-click on the "Shared" folder then select Add → New Item → .NET Core → MVC View Layout Page , name the file "_Layout.cshtml", click on the "Add" button
8. When you are finish you should have the following folder structure in your "Views" folder
9. In the _Layout.cshtml file you will see the following markup
<!DOCTYPE html>
<html>
    <head>
        <title>@ViewBag.Title</title>
        @RenderSection("head", required: false)
    </head>
    <body>
        <h1>This is from the _ViewStart.cshtml</h1>
        @RenderBody()
    </body>
</html>
In the code above the line @RenderSection("head", required: false) tells MVC to render the head section if it's there in the web page, however it is not required. Then in the line @RenderBody() tells MVC to render the body. We added the line <h1>This is from the _ViewStart.cshtml</h1> as an indicator that _ViewStart.cshtml file is being applied.
10. Now we are going to use the default _ViewStart.cshtml layout with our "Index.cshtml" file
11. Open the "Index.cshtml" file and delete all the markup for it if you have any
12. Now type in the following markup for the page index.cshtml
<h3>This is from Index.cshtml</h3>
In the code above all we have to do is type in the markup for our page, the common tags like the head and body tag has been taken care of by the layout.
Even though we didn't define any layout in our "Index.cshtml" file the layout specified in the _ViewStart.html file was automatically applied to our page.
If you run the application by pressing Ctrl+F5 you will the following
- How To Create An ASP.NET Core Application From Scratch
- ASP.NET Core : Add jQuery, Bootstrap, AngularJS Using bower.json
- Enable MVC On ASP.NET Core Application
- ASP.NET Core : Create Our First Controller and View
- ASP.NET Core : Adding The Default View With _ViewStart.cshtml
- ASP.NET Core : Create A Responsive Layout With Bootstrap
- ASP.NET Core : Adding Font-Awesome For Northwind Cafe Navigation Icons
- ASP.NET Core : Add .json Configuration Files With Microsoft.Extensions.Configuration Library
- ASP.NET Core : Entity Framework Core Models For Northwind Cafe
- ASP.NET Core : Create The NothwindContext ( EntityFrameworkCore )
- ASP.NET Core : Configure project.json File To Support Entity Framework Core
- ASP.NET Core : Add NorthwindContext To Startup Class And Create Database
- ASP.NET Core: Seeding The NorwindCafe Database
- ASP.NET Core: Add Logging To The NorthwindCafe Application
Subscribe to:
Post Comments (Atom)


Liên hệ Aivivu, đặt vé máy bay tham khảo
ReplyDeletevé máy bay đi Mỹ
các chuyến bay từ mỹ về việt nam hôm nay
vé máy bay từ nhật về việt nam bao nhiêu tiền
các chuyến bay từ đức về việt nam hôm nay
vé máy bay từ canada về việt nam
Lịch bay từ Hàn Quốc về Việt Nam hôm nay
Chi phí cho chuyên gia nước ngoài